
What is dry burning?

If you’ve been vaping for a while, you may have heard the term “dry burning” being thrown around here and there. You may be wondering what dry burning is and whether or not you need to do it.
Dry burning is basically firing your atomizer coil with no wick or liquid in order to burn off any residue that may have accumulated through use, thereby cleaning the coil and improving the flavour of the vape.
What you need to know about dry burning
Dry burning is for rebuildables
If you use pre-made coil assemblies, dry burning is generally not recommended (although there may be a few exceptions to this). The idea behind pre-made coil assemblies is ease of use, convenience and disposability. Once the coil has gunked up, you throw it out and insert a new one. You can dry burn a pre-made coil but you probably won’t like the results!
Dry burning is no substitute for a fresh coil

At best, dry burning may give you a day or two of extra use, unless you get into the habit of doing it every day, in which case it does significantly increase its lifespan. If you're like me and prefer the "set and forget" method of using your coils, the metal of the coil itself will eventually degrade with use. Therefore dry burning won't give you much benefit when your coil is getting long in the tooth.
Dry burning can be dangerous

There is the real risk of spitting hot fluid and even fire when dry burning, therefore you should follow all precautions and do it sensibly and responsibly.
How to dry burn your coils

Clear your space

As said previously, dry burning may involve combustion products. Therefore make sure you’re in a ventilated space away from any easily combustible materials. Yes of course you’re a tough guy (or gal), but make sure you don’t breathe the vapour in and be careful you don’t burn your hands or fingers.
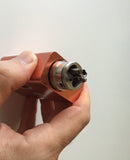
Remove your wick

Unless you’re using silica wick or SS mesh, the first thing you need to do is remove the old wick and throw it out. Even with silica, I would still recommend removing it. Dry burning with a cotton or rayon wick still inserted will burn it and can cause damage to your deck.
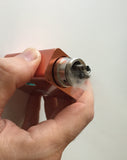
Check for residue prior to burning

Make sure you have no hanger-onners still attached, otherwise these will burn to the coil and be very difficult to remove, kind of rendering the whole exercise pointless.
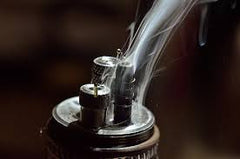
Fire your mod


Just like when burning in a new coil, press the fire button and hold it down until there is no vapour coming off the coil and the coil glows red hot. Remember, when you start this, a lot of crap will come spitting off, so be careful!
Check again for any stubborn residue

Make sure there are no sneaky bits of gunk or fluff hanging on for dear life (as you may notice in the above photo). If you can’t see any but want to make absolutely certain, you can rinse the coil or even soak it in isopropyl alcohol overnight, but then again why not just build a new one? Each to their own.
Fire your mod (again)


Once you’re sure the coil is residue free, fire again to ensure the coil heats up from the inner wraps outwards and that there is no flame, smoke or vapour.
And there you go – you’ve just dry-burned and cleaned your coil and are ready to re-wick!

Remember – don’t dry-burn your little Ego atty, best results are achieved if done daily, and make sure you take due care when dry-burning. Have fun!
Comments
0 Comments